Tuesday, December 28, 2010

Four Types of Chocolate Bark


This Christmas I wanted to make a treat for the four different homes that I was visiting. My husband loves my fudge but I didn't feel like making it. I had also made my famous pecan bars for a family celebration two weeks ago, so couldn't do a repeat. Then I was thinking about my candy bark. To make it you take every seasonal candy that is out there right now, mix it together, and pour white chocolate over the top. It tastes awesome and makes you feel like you are going to go into a sugar coma, but it takes some guts to try it if you are over the age of 15 and I figured people would look at it without trying. So I decided to make chocolate bark, candy bark's more sophisticated sibling.


The overall process is very similar for each recipe. Each type were scarfed down at each celebration, but my personal favorites are the Roasted Walnuts and Tart Cherries in Dark Chocolate and the Pecans in Salted Chocolate. Each recipe yields a whole cookie sheet of bark so be prepared to take it everywhere! I fed 4 different families and now still have enough to take to our friends for New Years Eve. Thank goodness because I am so tired I cant even make rice right now (recovering from the 24 hour stomach flu).

Roasted Walnuts and Tart Cherry Dark Chocolate Bark
Adapted From Food and Wine

Ingredients
2 1/2 cups of walnut halves
3 12 oz bags of bittersweet chocolate chips (I use Ghirardelli)
1 1/2 cups of dried tart cherries (coarsely chopped)
4 Tbs of crystalized ginger (finely chopped)

Preheat your oven to 350 degrees. Place the walnut halves on a cookie sheet and toast until golden and fragrant (usually around 8 minutes but keep an eye on them so they do not burn). Let cool then coarsely chop them.

When you have all your other ingredients ready, place the chocolate chips in a double boiler and stir constantly until melted. Take the double boiler off the heat and mix in the rest of your ingredients. Then pour onto a cookie sheet that has been lined with parchment paper, wax paper or foil. Using a spatula, spread out until at desired thickness or until it reaches the sides of the pan.

Let cool by putting in fridge for around an hour (should be completely hard and set before you take it out). Then either with a sharp knife or with your hands (which I usually do) break the bark into pieces.

Pistachio and Cranberry White Chocolate Bark
Adapted From Brown Eyed Baker


Ingredients
3 12oz bags of white chocolate chips* (I use Ghirardelli)
3/4 cup unsalted shelled pistachios
3/4 cup of crasins (dried cranberries)

Place the chocolate chips in a double boiler and stir constantly until melted. Take the double boiler off the heat and mix in the rest of your ingredients. Then pour onto a cookie sheet that has been lined with parchment paper, wax paper or foil. Using a spatula, spread out until at desired thickness or until it reaches the sides of the pan.

Let cool by putting in fridge for around an hour (should be completely hard and set before you take it out). Then either with a sharp knife or with your hands (which I usually do) break the bark into pieces.

*I didnt roast the pistachios but other recipes recommended it, so it is up to you whether or not you roast them

Roasted Pecans and Salted Chocolate Bark


Ingredients
2 cups of toasted pecans
2 12 oz bags of semi-sweet chocolate
2 12 oz bags of white chocolate
1 Tbs of coarse salt (I used coarse Kosher salt)

Preheat your oven to 350 degrees. Place the pecans on a cookie sheet and toast until golden and fragrant (usually around 8 minutes but keep an eye on them so they do not burn). Let cool then coarsely chop them.

When you have all your other ingredients ready, place the semi-sweet chocolate chips in a double boiler and stir constantly until melted. Then take the bowl off of the double boiler and put the white chocolate chips on the double boiler and stir constantly until melted.

Pour the white and dark chocolate in a checkerboard pattern onto a cookie sheet that has been lined with parchment paper, wax paper or foil. Then use a fork to swirl the semisweet and white chocolate together. Pour the roasted pecans on top, pushing them gently into the chocolate. Then sprinkle the salt on top of the chocolate.

Let cool by putting in fridge for around an hour (should be completely hard and set before you take it out). Then either with a sharp knife or with your hands (which I usually do) break the bark into pieces.

Candy Cane Bark


Ingredients
1 12 oz bag of semi-sweet chocolate chips
1 12 oz bag of bittersweet chocolate chips
2 12 oz bags of white chocolate chips
12 oz (2 regular packages) of candy canes, crushed

Place the semisweet and bittersweet chocolate chips in a double boiler and stir constantly until melted. Pour onto cookie sheet that has been lined with parchment paper, wax paper or foil.
Place into fridge for around 10 - 15 minutes to harden and then take out when ready for white chocolate chips.*

Place the white chocolate chips in a double boiler and stir constantly until melted. Pour onto the dark chocolate layer. Spread carefully so the brown chocolate does not show up in the white. Then pour your crushed candy canes on top and press them into the chocolate.

Let cool by putting in fridge for around an hour (should be completely hard and set before you take it out). Then either with a sharp knife or with your hands (which I usually do) break the bark into pieces.

*Many people have had the two parts of the chocolate separate when breaking the bark into pieces. I felt it was a temperature problem (as the Brown Eyed Baker has you put it in the freezer for 30 minutes) and that pouring the white chocolate on something so cold would not let the dark chocolate melt to create a bond. I still did have a little on the edges separate but not much, so it is up to you on how long you want the dark chocolate to cool

Sunday, December 26, 2010

Radishes Three Ways


Christmas is over, hurrah! As I am getting older it just seems like more and more work. Im not totally "Bah Humbug," having the holidays at my parents house yesterday was great, but Im worn out from 2 days of driving and socializing. Plus my cats are super active right now and are having mini cat fights around the house and jumping from really tall heights. I think, with us traveling the last two days and dealing with the car crash this week, that they are feeling neglected.

On my quest to try new foods, I bought radishes. I already knew that I liked daikon radishes and have made different korean dishes with them but I don't remember the last time I actually tried regular radishes. After watching an episode of No Reservations with Anthony Bourdain in France, and watching how they so enjoyed radishes with salt and butter, I wanted to try.


In the end, I still like daikon radishes (the third recipe I don't have a picture for, as I made it over the summer for a picnic but it is a great recipe) and I think that the regular ones are good sauteed in butter when they are on top of garlic mashed potatoes, but on their own... I wouldn't eat a whole plate of them. Everyone says that they are great on a crusty french loaf, and I would agree... if I could eat a loaf of french bread (or if my dad was here to make me GF french bread).

Sauteed Radishes


Ingredients
2 Tbs of butter
1 - 2 bunches of rashes, cut into fourths (small ones in half)
1/4 cup water
Salt and pepper to taste*

Melt butter in saute pan and add water. Set over medium high heat. Add in radishes, shaking the pan every few minutes so they dont stick, and cook until tender and golden brown (around 7 minutes). Add salt and pepper to taste.

*You can add any herb that you would like to this dish. I added 1/4 cup of fresh chives the second time I made these and they had a much more interesting flavor.

Pickled Diakon and Red Radishes With Ginger
Adapted from Gourmet

Ingredients
1 1/2 lb daikon radish, peeled
1 bunch of red radishes, trimmed and cut into 6 wedges each
1 Tbs kosher salt
1/2 cup of rice vinegar (not seasoned)
6 Tbs sugar
1 Tbs of very think matchsticks of peeled ginger

Cut the daikon radish lengthwise then cut crosswise into 1/4 inch thick slices. Add in sliced red radishes in a large bowl and toss with kosher salt. Let stand at room temperature, stirring occasionally, for 1 hour. Drain in a colander without rinsing and put into bowl.

In a small bowl add vinegar and sugar. To get the sugar to dissolve you can keep stirring, as Gourmet suggests, or I find microwaving the vinegar and sugar for 30 sec to 1 min will give you a better solution (watch out, it smells!). Add the ginger. Pour on top of the radishes and put into an airtight container and chill. Shake every once and awhile. Should be ready after 12 hours and can last for up to 3 weeks in fridge. When you open, these do have a very strong smell which some people do not like, but taste great.

Korean Daikon Radish Salad

Ingredients
1- 1 1/2 - 2 pd white daikon radish
2 Tbs salt
1 small carrot
1/4 cup rice vinegar
2 Tbs sugar

Using a food processor shred the daikon radish and carrot, mixing them together. Place the shredded vegetables into a bowl and add the salt. Mix and let sit at room temperature for 15 minutes. Drain in a colander, rinsing well with cold water, and then drain throughly by squeezing as much liquid as you can get out of them.

Mix the vinegar and sugar together, either in a small sauce pan over medium low heat or in the microwave for 30 sec - 1 min until the sugar dissolves. Put the daikon/carrot mix in a bowl and pour the vinegar over the top. Chill for at least 6 hours, stirring occasionally.

Thursday, December 23, 2010

GF Roasted Butternut Squash Lasagna

Well it is the day before Christmas Eve and I spent 7 hours cooking... even though I didn't have to. I made 4 different types of chocolate bark to take to 4 different Christmas parties that we have in the next two days. Then I made my wild rice with carmelized onions and cranberries for my Aunt's Christmas Eve Party tomorrow. Finally I made stuffed apples, curried swiss chard and a vegetarian tamale pie for my parents' Christmas tomorrow.

I just finished and was going to try to go swimming but collapsed instead. So now I'm eating my pho (from Bon Bon, its good!) and relaxing in front of the TV with a cat on my arm (who looks so funny because I shaved him last week). It feels nice to relax with the crazy week that I have had. On Saturday night my husband was in what could have been a fatal accident. Luckily my husband swerved (quick reaction which he attributes to playing video games) and the man only took out the left side of the car. My husband has a lot pain, but luckily nothing life threatening. I've spent the last 5 days driving him everywhere and taking care of him but tonight one of our friends is back from the Navy and he took him to dinner, so I get some time off. Back to craziness tomorrow.


I made this lasagna as a combination of different recipes. I wanted to make something different and haven't made lasagna before. I thought it would be fun but instead was a learning experience. I am not a fan of cheese so I only used a small amount of parmesan and mozzarella cheese. However, I'll put in what "normal" people would use for cheese in the recipe.

Gluten Free Roasted Butternut Squash Lasagna


Ingredients
1 butternut squash (1 1/2 - 2 pounds)
2 tsp salt
1 tsp of dried sage
1 tsp ground black pepper
1 Tbs brown sugar
15 oz ricotta cheese
1/2 cup of Parmesan cheese
2 Tbs of water
A box of gluten free rice lasagna noodles

Preheat the oven to 350 degrees. Use a knife and prick a few holes in the squash. Place on a baking sheet and bake for 1 hour until soft. While your squash is roasting, cook your GF noodles according to specifications on the box.

After the squash has roasted and is cool enough to touch, remove the fibers and seeds and peel off the skin. Place the squash meat into a food processor and process until pureed. Mix in the sage, 1/2 tsp of black pepper, 1 tsp of salt and the brown sugar.

Mix the ricotta, 1/4 cup of parmesan, 1/2 tsp of black pepper and 1 tsp of salt together in a different bowl.

Spray a 9 x 5 baking dish with cooking spray and put 2 Tbs of water at the bottom of the dish. Then place a layer of noodles at the bottom of the dish, overlapping slightly. Spread 1/2 of the squash mixture over the noodles and then 1/2 of the ricotta mixture. Then repeat with noodles, squash, cheese, and noodles. Sprinkle the top noodle layer with 1/4 cups of parmesan cheese.

Cover the dish with foil and bake for 30 minutes. Remove the foil and bake 10 - 15 minutes until the cheese begins to golden on top.

Saturday, December 18, 2010

Eggplant Three Ways

So, yeah, I am sooooooo bored. I know that is a luxury, but with this new schedule I am still in work mode and then have nothing to do. I have already steam cleaned my parents carpet, fixed and cleaned our fridge, done all the laundry, created 3 DVDs (2 of wedding videos and 1 of the bachelor party), played video games, read 2 books, and I don't know what else, but now it has been a week and I am going stir crazy. I've got NPR going on in one ear for background noise because I am so used to having people around and am in the middle of roasting a whole butternut squash. I still have my National Board stuff to do and other things for work but it is hard for me to concentrate and write at my house unless it is on a deadline. It is almost impossible to go to a library around here and I miss the one by my parents house, which is an hour away from here. I don't feel like driving in the freezing cold (10 degrees right now) to go to a library to write, so I guess I'm stuck here knocking my head against the wall. I wish it was summer so I could at least go outside, but noooo, now I have to have my weeks in the freezing cold where there is nothing to do!!!!!

Here are three eggplant recipes. They aren't the most beautiful pictures but the meals are really good. I was actually wishing that I was having the eggplant caviar today while I was eating at Manny's. It is a famous deli, which we haven't gone to before, despite the fact that we have lived here for 10 years. Today we had nothing in our fridge because it broke down and my husband had 45 minutes before going to work, so he decided to go there. Honestly, a year ago I would have loved it- a huge pile of corned beef on rye with mustard, but now I could only eat the meat and it just was bland. It was kinda depressing because with the way my gastroparesis is going I have become the hardest person to take out to eat. There is nothing that I want to eat at restaurants... it seems like everything makes me sick, unless I make it on my own. Eating out has always been one of our hobbies and now I still go out but I don't enjoy it at all.

The second recipe may not look at good as it should, because I don't have a wok. My kitchen is small and there is absolutely no more room for any pots/pans/cooking utensils/anything! However it still works out well in a pan.

The eggplant recipe without a picture is a recipe that I made this summer. You may not be able to see the final product, but do not let that discourage you. It was an awesome side and had a unique flavor that was a fun addition to a family picnic at the beach.

Eggplant Caviar
Adapted from Color Me Vegan


Ingredients
1 purple Italian eggplant
1 tbs olive oil
1 yellow onion, finely chopped
4 cloves of garlic, minced
1 cup of quinoa (if you have black quinoa, looks even cooler)
2 cups of vegetable stock
3 Tbs of minced fresh cilantro
2 Tbs of minced thai basil
2 Tbs of gluten free soy sauce
2 Tbs of lime juice
Salt and pepper to taste

Preheat the oven to 400 degrees. Prick the eggplant with a knife all over and put on a lightly oiled baking sheet. Roast for 45 to one hour until soft.

Add the olive oil to a pan and cook the onion and garlic over medium heat until soft and slightly golden. Then add in the quinoa and stir constantly for 1 minute. Add in vegetable stock and bring to boil. Then reduce heat, cover, and simmer for 15 minutes. Remove from the heat and let sit for 10 minutes. Then transfer quinoa to a mixing bowl, fluffing it, to cool.

Once eggplant is cool enough to touch, peel off the skin and put the flesh of the eggplant into a food processor. Add the cilantro, thai basil, soy sauce and lime juice. Puree to a paste and add salt and pepper to taste.

Mix the eggplant mixture and quinoa together and add additional seasoning if needed.

Garlic Eggplant
Adapted from The Breath of a Wok

Ingredients
2 Italian eggplants (or 4 Asian eggplants if you've got them)
1/4 cup gluten free soy sauce
2 Tbs of balsamic vinegar
2 Tbs of sherry
1 Tbs of sugar
1 tsp of salt
2 tsp of red pepper flakes
2 Tbs of oil
6 cloves of garlic, chopped
2 Tbs of ginger, minced
2 tsp of sesame oil
1/4 cup of green onions, sliced

Peel the eggplant and cut into two inch sections. Then halve each lengthwise and then cut into thirds to make sticks. You then steam the eggplant for 5 -8 minutes until soft*.

Combine the soy sauce, vinegar, sherry, and pepper in a bowl.

In a wok (or frying pan, like I did it) on high heat, add in oil and stir fry garlic and ginger for 10 seconds. Add in the steamed eggplant and stir fry for 30 seconds. Add in the sauce and cook for around a minute. Take off of heat and add sesame oil and scallions.

*When I made this I looked up a way of steaming without using a steamer rack, because I dont have one. If anyone knows how, please let me know. I remember it was putting the chunks in a pan and adding around a 1/4 cup of water... but I cant find the directions now anywhere online. Thanks

Honey Garlic Eggplant
Adapted from Beyond Salmon
Ingredients
2 eggplants
2 Tbs honey
2 Tbs olive Oil
4 garlic cloves, minced
2 tsp balsamic vinegar
1 tsp red pepper flakes
1/2 tsp smoked paprika
Salt and Pepper

Peel the eggplants so you have stripes of skin and no skin then cut into 1/2 inch circles. Toss eggplants with kosher salt (around one Tbs) and let sit in a colander for an hour. Rinse the eggplant to remove the salt and then squeeze it to draw out more moisture. Pat dry with paper towels.

Preheat grill (I used a grill pan) to high. In a large bowl mix all other ingredients. Dunk dried eggplant slices into the marinade.

Brush oil on grill. Place the eggplant slices on the grill, cover, and turn the heat to medium. Grill until marked, which is around 3 minutes. Then turn 90 degrees so you have tic tac toe marks. Grill for around 3 more minutes. Brush the slices again with the rest of the marinade and flip. Do the same thing on the other side. You want the eggplant to brown, but not burn. Take off of grill and put on a plate. Drizzle with olive oil.

Thursday, December 16, 2010

Zucchini and Wild Rice

Well, my fridge is broken... Thats fun. The freezer is fine but the fridge is warm and I have already had to throw out my milk, butter and eggs. I just spent an hour vacuuming cat fur from under and behind the fridge, but I don't think it is going to help. This makes dinner difficult. I think I am going to pickle the radishes (daikon and regular) that I have and then just have mashed potatoes. Not exciting, but at least I am using some things from my fridge and reducing the food I may have to throw away. I am tempted to put the items (at this point, all sauces) in our common area outside my back door. I think with how cold it is outside right now, that this indoor area is probably colder than my fridge!


Here is one of the recipes from Barbara Kingsolver's Animal, Vegetable, Miracle. I enjoyed reading this book and it was much easier to get through than the Omnivore's Dilemma, which I am still working on (whenever I eat breakfast, the rest of the time I'm working on different novels- right now the Magicians by Lev Grossman). I feel like it preaches less and makes you want to try new things. One thing that it made me do while reading, was look up kits to make cheese at home. I only like parmesan (which takes a lot of work) and mozzarella cheese, but you can make mozzarella at home and sounds really cool. The book also had me try zucchini for the first time. My mom has always cooked with zucchini, but I would never try it. This dish turned out really tasty, but then I got really sick a few days later. When I pulled back out my food sensitivity test results, I found that it shows I am very sensitive to zucchini (very red) so I guess it is the first, and last, time I am trying it!

Zucchini and Wild Rice
Adapted from Animal, Vegetable, Miracle


Ingredients
1 cup of cooked wild rice (book uses 3/4 lb of orzo pasta)
1 chopped onion
4 cloves of garlic
3 large zucchini
1 Tbs olive oil
1 Tbs fresh thyme
1 Tbs fresh oregano
Parmesan cheese

Use a grater to shred the zucchini. Then saute the garlic, onion, and zucchini together in olive oil on medium heat. The zucchini mixture is supposed to turn lightly golden, but I sautéed until all the items were soft (couldn't get it to golden). Add thyme and oregano and remove from heat. Toss with wild rice and add cheese, salt, and pepper to taste.

Tuesday, December 14, 2010

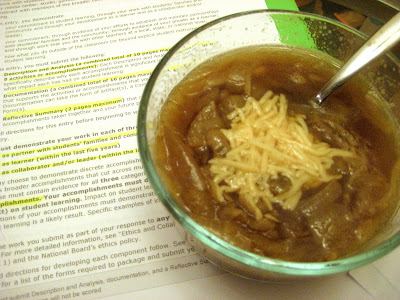
French Onion and Egg Drop Soups

So I am on my three week holiday break from work. I know it is only teachers who can complain about having three weeks off, everyone else would relish it, I am just having a hard time with our new school year schedule. I need this week off during the summer where it is warm out and I can actually do something rather than now where I am sitting next to my space heater, even with the heat in the house on, because it is 10 degrees outside. The next three weeks are to organize..my house, my National Board stuff, my computer, etc. While I'm blogging I am waiting for movies to load into imovie so I can put together our dvd for this year. We just got a video camera in June to tape our wedding, but already I have enough for 4 different DVDs and have to start putting them together... what else is 3 weeks for? Relaxing? I dont know how!


One of the things that I am organizing, is my recipes. Today I am going through two of my soup recipes from the three weeks where I could only drink liquids and eat soft foods. Both turned out really good for being soup (not one of my favorite things, even though I have 3 huge books of soup recipes). These may not be the most exciting pictures, but keeping track of the recipes on my website allows me to print out them out later (important for this organizing binge Im on!)

French Onion Soup


Ingredients

2.5 lbs of onions (sliced into 1/2 moons then sliced in half again)
1/2 stick of butter (1/4 cup)
4 cups of beef broth
Salt
Black Pepper
Parmesan or Asiago Cheese

Put the pot (or saucepan) on medium heat. Cut the butter into small chunks and place in the pot. After the butter has melted and begins to foam, put in the onions. Stir the onions so they are covered in butter and add a teaspoon of salt. Turn heat to medium low and let the onions cook, stirring every once and awhile. Caramelizing the onions typically takes 45 minutes or more at this heat. Let them turn a mahogany color, but dont let them burn. Pour in your broth and turn the heat to high so that it boils. Then turn the heat down and let simmer for 1/2 an hour or more--you want the soup to reduce and look shiny. Season with salt and pepper, pour into bowls and add cheese and any other toppings you like.

Egg Drop Soup
Adapted from Gourmet

Ingredients

5 cups of chicken stock
1 tsp of soy sauce
2 Tbs cooking sherry
1 tsp of ginger powder or 1 two inch piece of fresh ginger
2 garlic cloves smashed
2 large eggs, lightly beaten
2 green onions, thinly sliced
2 tsp sesame seed oil
Ground black pepper

Bring stock, soy sauce, sherry, ginger, garlic to boil in a pot. Simmer for 4 minutes, then remove garlic and fresh ginger (if added) with a slotted spoon. Stirring soup in a circle, add in eggs slowly. Simmer for around 1 minute until eggs are cooked. Take off of heat and add cut scallions and sesame seed oil along with salt and ground pepper to taste.

Saturday, December 11, 2010

Wild Rice with Caramelized Onions and Cranberries

This has to be one of my favorite dishes of all time. I think it is a perfect dish for Christmas to follow my sweet potato risotto for Thanksgiving. I thought it was soo good because of the butter which I rarely cook with but my dad said that it is the caramelized onions and my grandfather agreed saying that even putting them on top of ice cream would taste good (I don't know about that one).

I am making this dish again tomorrow for my husband's family's Christmas party. He doesn't think that they will like it, because they have very traditional tastes, but I think the situation is like the one that I had with my aunt and cousins. When I brought my sweet potato risotto and ginger cranberry sauce to Thanksgiving I really thought they wouldn't like it because they have traditional tastes and have eaten the same thing at Thanksgiving for as long as I can remember. My aunt revealed that she didn't know what risotto was and my cousin said she hadn't eaten sweet potatoes before (they've had it for Thanksgiving before but it is usually covered in marshmallows). However, after getting past the initial reluctance, my risotto was the first dish finished and they ate all of the cranberry sauce too. I think that many people don't try new foods because they are not comfortable in making something new. I think once they try it, and the ingredients are not too far from their comfort zone, that they will find that they like it, and I hope that is what happens tomorrow.

Wild Rice with Caramelized Onions and Cranberries
Adapted from Ocean Spray


Ingredients
2+ cups vegetable or chicken broth (depending on directions on bag/box)
1 cup of wild rice
3 Tbs of butter
3 medium onions sliced in thin wedges
1 cup of dried cranberries

Cook wild rice according to directions using chicken or vegetable broth. Melt butter in a medium skillet, add onions, and stir to coat onions with butter. Reduce heat to low and cook onions until caramelized (around 30 minutes). Stir in cranberries. Cover and cook for 10 minutes on low until cranberries start to swell then mix cranberry onion mixture into cooked wild rice.

Wednesday, December 1, 2010

Carrot Fries

Sometimes in special education, paperwork can get overwhelming. I just did my progress reports for 5 classes and then IEP goals for 4 kids (3 each) and now it is 9:00... argggg. This is also a hard time for me right now... with our new "year round" schedule (which I hate) we only have two weeks of school between Thanksgiving break and Winter break. Two weeks to try to do two video lesson for National Board (I did one today... first they tried to take my student teacher for a field trip, then my camera went out of batteries and the kids were totally off), raise money, collect money, buy items and teach 50 freshmen how to sew stockings so we can given stockings filled with necessary items to the homeless through Night Ministry, and finish our Donorschooose.org thank you project. Plus my husbands 30th birthday has this whole weekend filled with events. Also one of my good friends from work had her adult son murdered on Thanksgiving and I am sick to my stomach on all of the horrible things she has had to endure this year and amazed at how she can hold it all together, I don't know how she does it...I don't know if I could. I am going to his services tomorrow.

So with all of this going on, I am cooking but not posting. Today will be a quick post. I have discovered a new snack food. It is made from one of the vegetables I have previously hated... carrots. Well, I don't know if I really hated carrots but I would pick them out of most every dish that I ate that had them inside unless they were super soft. These carrot fries are awesome with catsup (and my cat Crookers went nuts over them but I only allowed him one with no salt). Have fun!

Carrot Fries


Ingredients
16 medium sized carrots
1 tbs of olive oil
salt and fresh pepper to taste

Turn the oven to 475 degrees. Peel the carrots and cut then into matchsticks 4 inches long. Put the carrots into the bowl and toss with the olive oil. Spread them out on a baking sheet. Sprinkle with pepper and salt. Bake until they start to get crisp. Toss them every 15 minutes. Mine usually finish in 45 minutes, but it depends on how thinly you cut the carrots.